
I first experimented with weather satellite image reception of HFFax at, I think, 120 lines per minute. These SW broadcasts were decoded and printed out on a 9-pin dot matrix printer; but that was a very long time ago!
About 4 or 5 years back, I used the WXtoImg application and HDSDR together with my first RTL-SDR dongle and decoded some images from the NOAA - National Oceanic and Atmospheric Administration – weather satellites; with a degree of success.
This application was written by Craig Anderson from Auckland, New Zealand but the website was sadly abandoned in 2018 and all contact lost with the author.
I had used this software 4 or 5 years ago, with some success, but had subsequently uninstalled it. 😱
I thought I would try to repeat the exercise with my newer NooElec SMArt V dongle and WXtoImg and – my SDR application of choice – SDR#.
Fortunately, a ‘fan’ site – mirroring the original – has been put together and can be found at https://wxtoimagerestored.xyz/ from where the final stable and beta release original applications can still be downloaded. This is a good reference site and provides a detailed explanation of the whole business of receiving and decoding the NOAA satellites’ data.
However, I continued investigating online and came across the Wraase website. Those familiar with the early days of SSTV would be familiar with the name. Volker Wraase’ site has a dedicated WXtoImg section https://www.wraase.de/wxtoimg/ where he has compiled Windows™, Linux and macOS versions of the application.
The location, at any particular time, of the NOAA satellite in question can be calculated from a set of Keplerian elements, or Keplers1 , which describe how a secondary body orbits a primary one and are critical to the correct operation of the software.
As the Keplers data provider – Celestrak2 – had changed their top-level domain from .com to .org, the Kepler updating part of the original WXtoImg had fallen over. Several solutions were offered by helpful individuals and I first tried the proxy ‘wrapper’ method to handle any application redirects. This works fine except that you have to remember to run it each time you use the programme.
The best/easiest solution appeared to be the Wraase ‘pre-configured’ Windows™ version which comprises the WXtoImg application and a ‘one click’ Kepler updater .exe to run alongside.
I used that particular option for this write-up; from the page link as shown below:
.
The remaining list of prerequisites included, from my perspective:
- RTL-SDR - NooElec SMArt V
- SDR application – SDR#
- Virtual audio cable - https://vb-audio.com/Cable/
- Accurate/NTP PC clock - https://www.meinbergglobal.com/english/sw/ntp.htm
- Suitable antenna – ideally a QFH for 137 MHz, but I use a 120 ° folded dipole
When you extract the .zip file, it will create the following folder and files:

Run the .bat file to install the WXtoImg application. Note: this is the ‘full’ version of the application that includes composite images and animations that were premium options originally!
When you first run the application, you will need to update the Latitude, Longitude and Altitude:
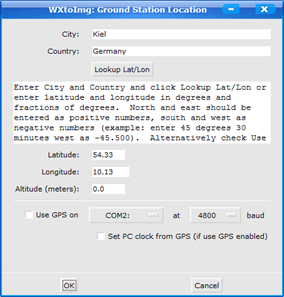
The City and Country combination works for very large towns but I found I needed to put in the information manually.
Next follows a ‘Calibration’, and Copyright, screen; a set of notes detailing the need for Kepler updating, correct Volume settings and accurate sampling frequency to counteract any slant issues.
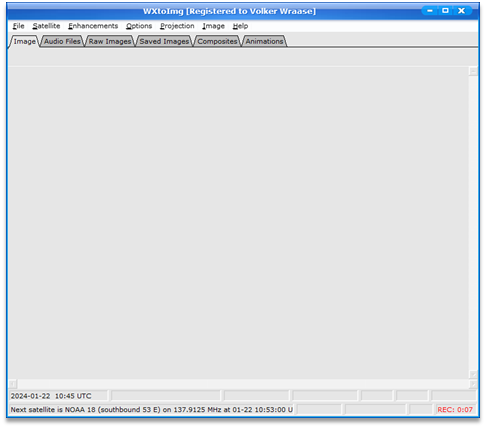
Then, after closing that window, you see the main screen. Yes, it will appear ‘empty’ 😀:
I would suggest reading and following the Calibration advice. I had already made the necessary sound card adjustments whilst using other applications. Running Meinberg3 means that I have an accurate timing solution in place too and I would also thoroughly suggest using this ‘set and forget’ piece of software.
Part of the pre-configuring includes removing NOAA-17 from the “active” list and ticking the box to
ensure that any future changes will be reflected in this dialogue box.
This is important because, if the data cannot be accessed from the Celestrak 2-line elements .. the application crashes!
This just leaves the Keplers-Updater.exe file – in the unpacked ‘files’ folder. It does not refer to any other files in order to run, so can be put wherever is convenient.
When there is a suitable pass, my procedure is:
- Switch sound card to virtual audio cable
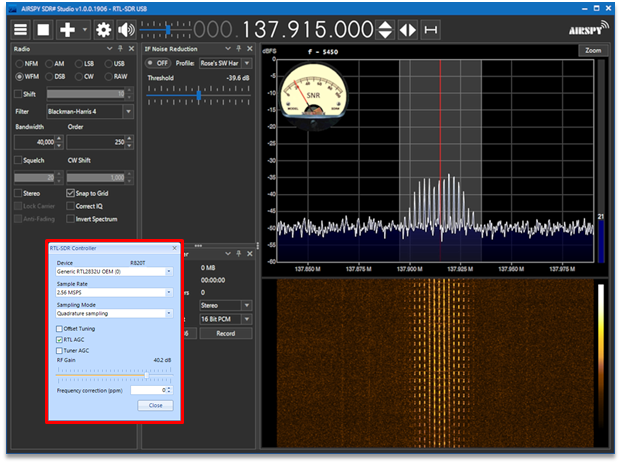
- Start SDR#; ensuring no IF filtering, Wide FM with around 40 kHz bandwidth and set the RTL-SDR Controller to RTL-AGC and 40dB gain. Normally I leave it on Tuner AGC as, using an indoor antenna, the signal is almost impossibly weak otherwise
- Run the Keplers-Updater.exe file
- Run WXtoImg
- Ensure that ‘Recording options’ under the menu bar ‘Options’ shows virtual audio
cable
- Under menu bar ‘File’, click ‘Record’ and make sure – at the least – ‘Create images’ is ticked.
- Better still; select the ‘Auto record’ button which will start the record process as soon as the satellite reaches the settings present in ‘Options’, ‘Recording Options’. I have to set high elevation minimum values due to be surrounded by buildings!
- Another point to remember – though this becomes obvious as soon as the satellite data is being captured – is to allow for Doppler shift. Start ‘high’ of the satellite frequency and follow it ‘low’ of the frequency; keeping the signal centred in the bandpass.
This really is the tip of the iceberg where WXtoImg is concerned, but hopefully sufficient pointers to get you started ! 😀
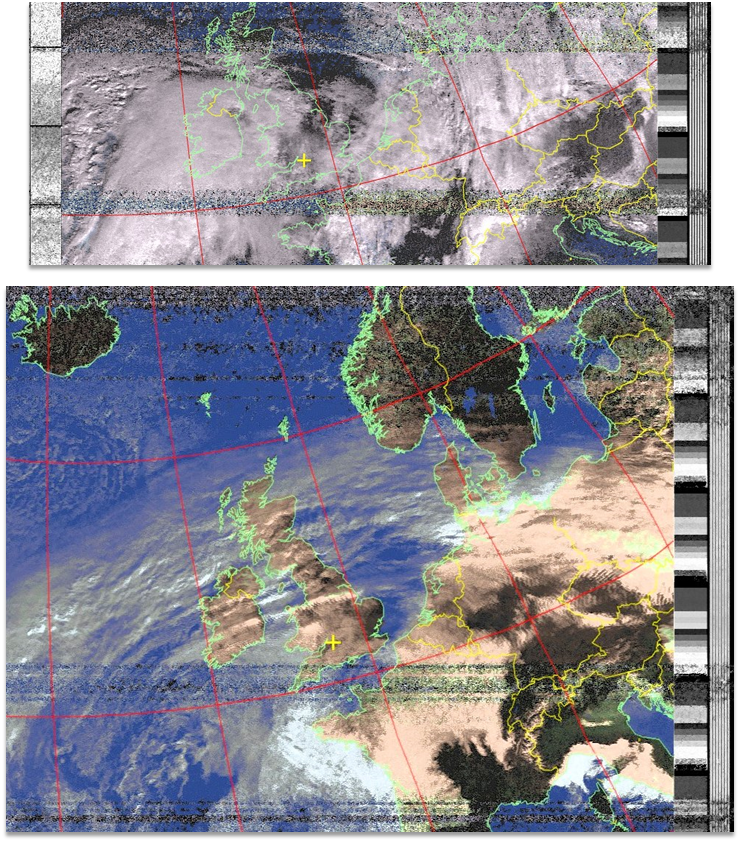
A few example decodes:
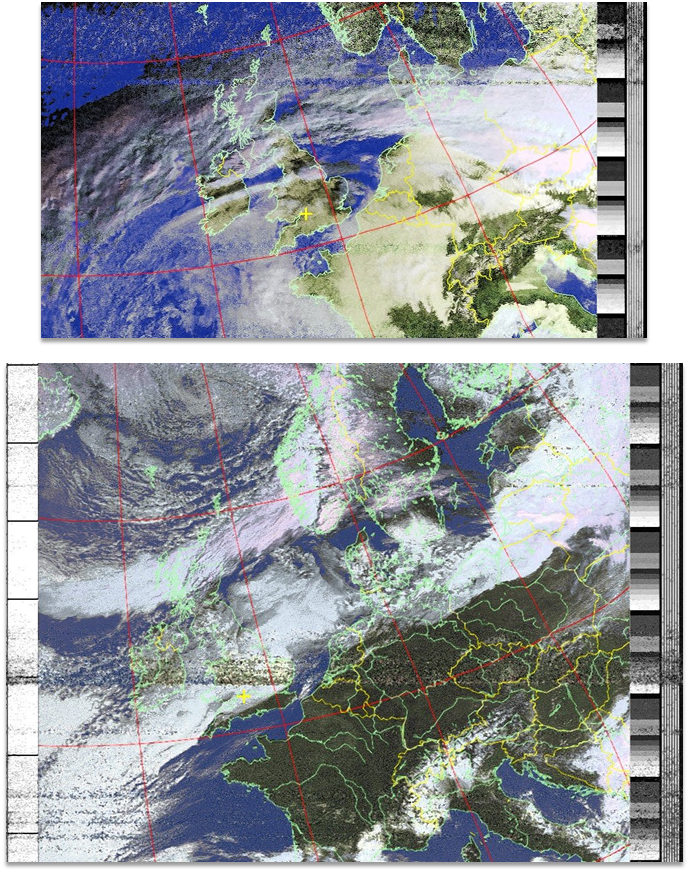
Best of luck!
Robin.
References
1 https://en.wikipedia.org/wiki/Orbital_elements
2 https://celestrak.org/NORAD/elements/
3 https://www.meinbergglobal.com/english/sw/ntp.htm