They are, primarily at the low cost end of the market, in the format of a USB key and designed to work in conjunction with a personal computer fitted with a soundcard or alternative AD converter.
I have made a review of a couple of alternative freeware SDR applications, used in conjunction with a low cost RTL-SDR device based on the RTL2832U chip.
At the time of writing, it is now possible to obtain a 0.5 ppm TXCO 150 KHz to 1.75 GHz coverage device for less than £35!
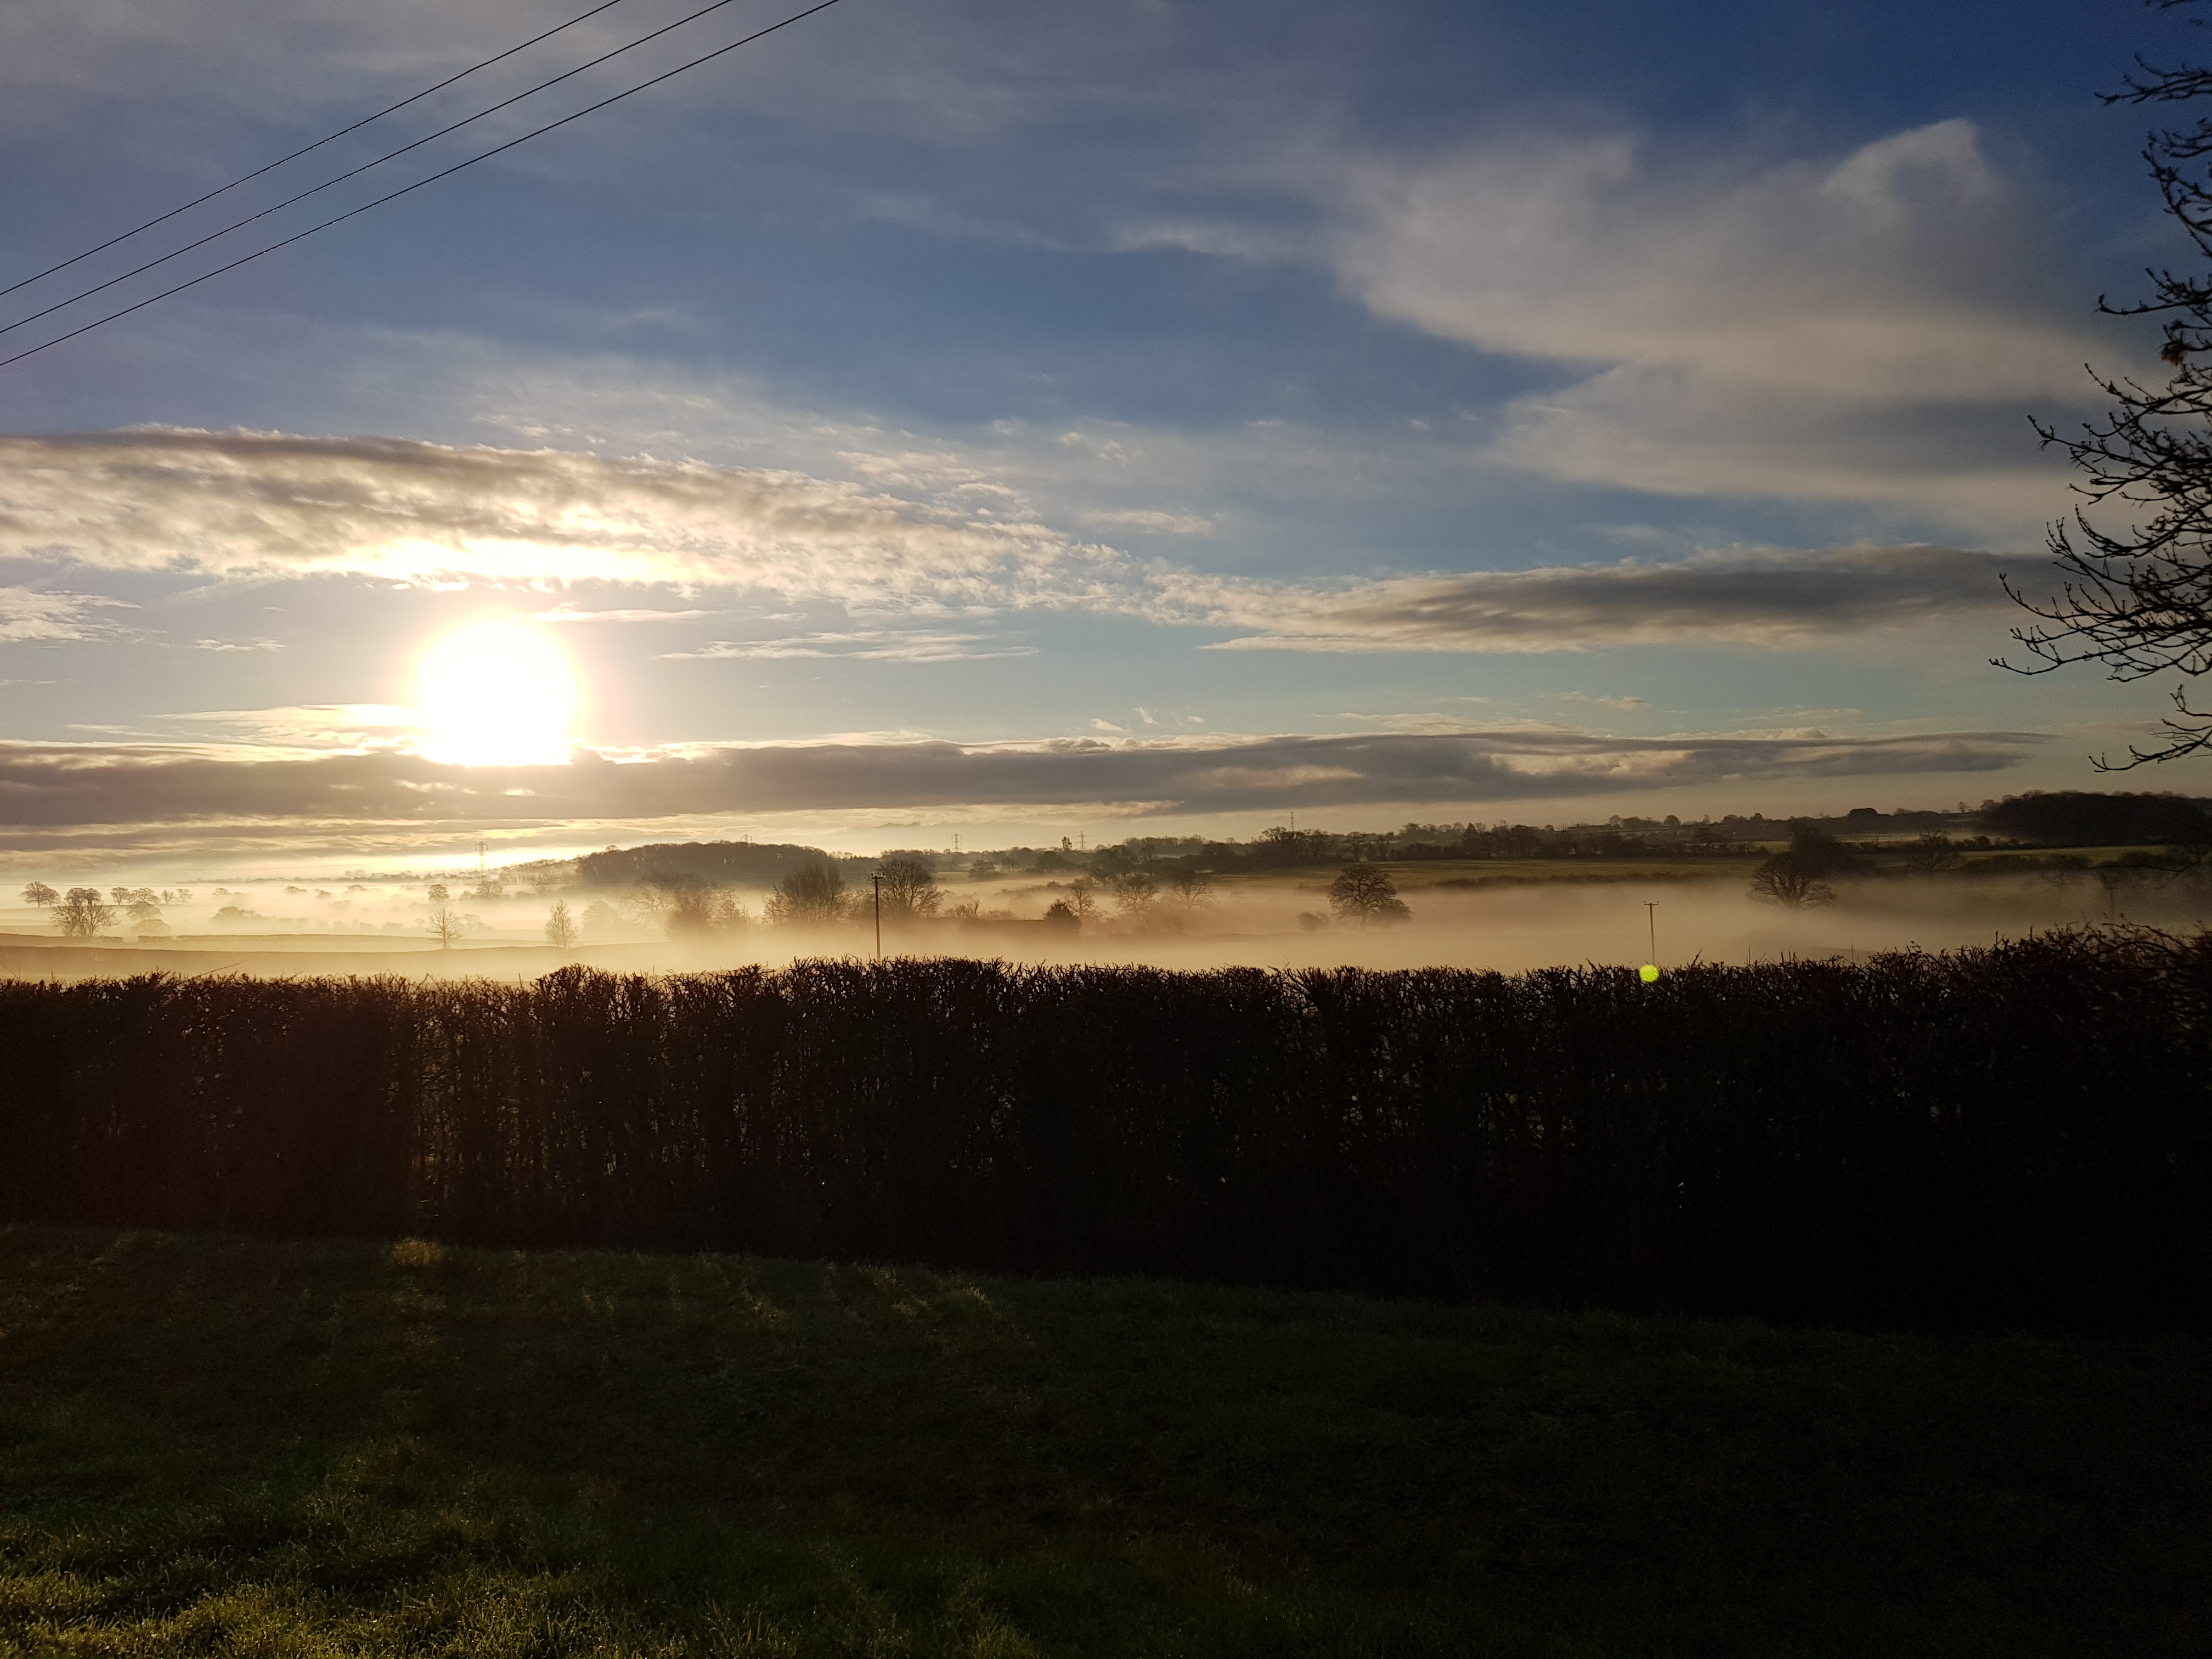
SDR with the Nooelec SMArt V5, SDR# and SW broadcast stations
This is not intended to be a technical explanation of the workings of software defined radio, as that would be far beyond my ability; but, instead, how to get up and running with simple hardware and a relevant Windows™ application. I’ve limited this to Windows™ as it is the operating system with which I am most familiar, and I was unable to find anything that would run under Fortran 4.
There are several SDR software applications available, from HDSDR to the excellent SDR Console from Simon Brown/G4ELI and AirSpy’s SDR#. Not all will allow you to configure direct sampling, which is necessary in order to access the HF bands and below.
Early hardware modifications included piggybacking a base amplifier with 50 Ohm matching transformer and 5V rail filter direct to the RTL2832 chip. Another consisted of soldering an “antenna” wire directly to the RTL chip, bypassing the tuner!
The Nooelec SMArt V5 will provide acceptable reception of frequencies down to 100 KHz and won’t break the bank at around, (at time of writing), £35. It certainly won’t have the low noise and better dynamic range achievable using an up-converter, but has allowed me to hear a number of ‘DX’ broadcast stations with my compromise indoor antenna set-up. I decided to use SDR# as it has a nice clear screen layout and is, relatively, easy for me to get my head around.
SDR# doesn't install as a conventional Windows application, in that it doesn’t populate either the ‘Program Files’ or ‘Program Files (x86)’ folders. It is supplied as a 'Zipped' archive file and can be ‘dropped’ and unpacked to a convenient folder. It is run from the executable – SDRSharp.exe – and a suitable shortcut placed on the Desktop if needed.
SDR# is recommended by RTL-SDR.com website and they have an excellent guide on how to install it specifically to work with the RTL type dongles.
Download the guide from: RTL-SDR Quick Start Guide
A batch (.bat) file is supplied as part of the ZIP package – install-rtlsdr.bat – and running this file will download the necessary driver file, and a copy of Zadig; the generic USB driver installer application for SDR type dongles.
It creates a temporary download directory and then unpacks the .dll driver file to the SDR# folder, runs Zadig to install the USB driver and then tidies the temporary stuff away!
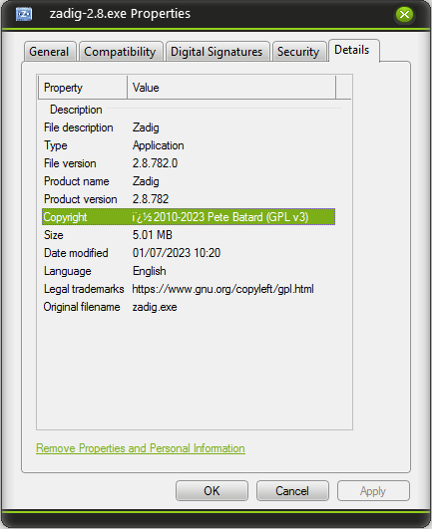
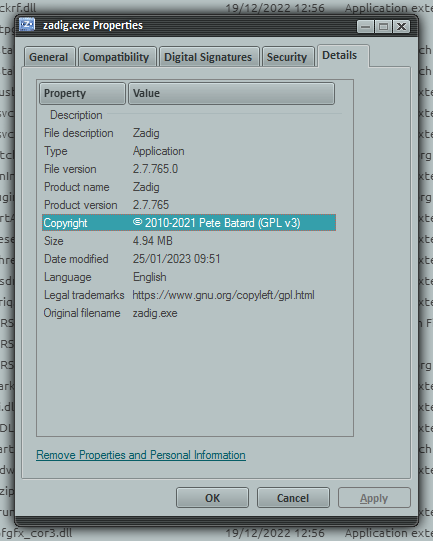
I did notice that the file version being used dates from 2018! If you wished to use the latest Zadig version, (at time of writing), you would need to replace – by editing in Notepad - the following line:
set zadig_url=b721/zadig-2.4.exe with set zadig_url=v1.5.0/zadig-2.8.exe
Checking the properties of the downloaded file confirms that it is the up to date version - see screenshot below:
I have to admit I did not go through the whole instruction before starting to play with SDR# but fortunately came across probably the most important setting early on.
By default, the gain is set to ZERO!
I’ll show a screenshot of the RTL-SDR Controller window further down this article, ֍ but clearly it is important to make this adjustment, before you try anything else, unless you are happy to listen to a quiet hiss! 😆
The first thing was to set the basic parameters of the dongle via the Settings cog:

As the input signals are all going to be below the local oscillator frequency, 28.8 MHz; the requirement for establishing whether a signal is + or - of the LO – as would be in the case of quadrature sampling – is negated.
The sampling mode is set to: Direct sampling (Q branch)
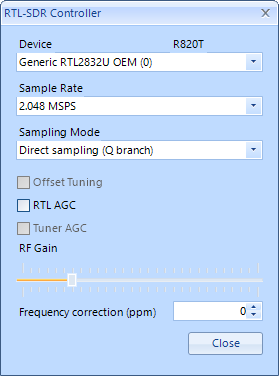
֍ Also note the ‘RF Gain’ slider no longer sits at ‘0’! ![]()
Place ‘Sampling Mode’ in ‘Quadrature sampling’ to enable the gain setting to be adjusted before switching back to ‘Direct sampling (Q branch)’.
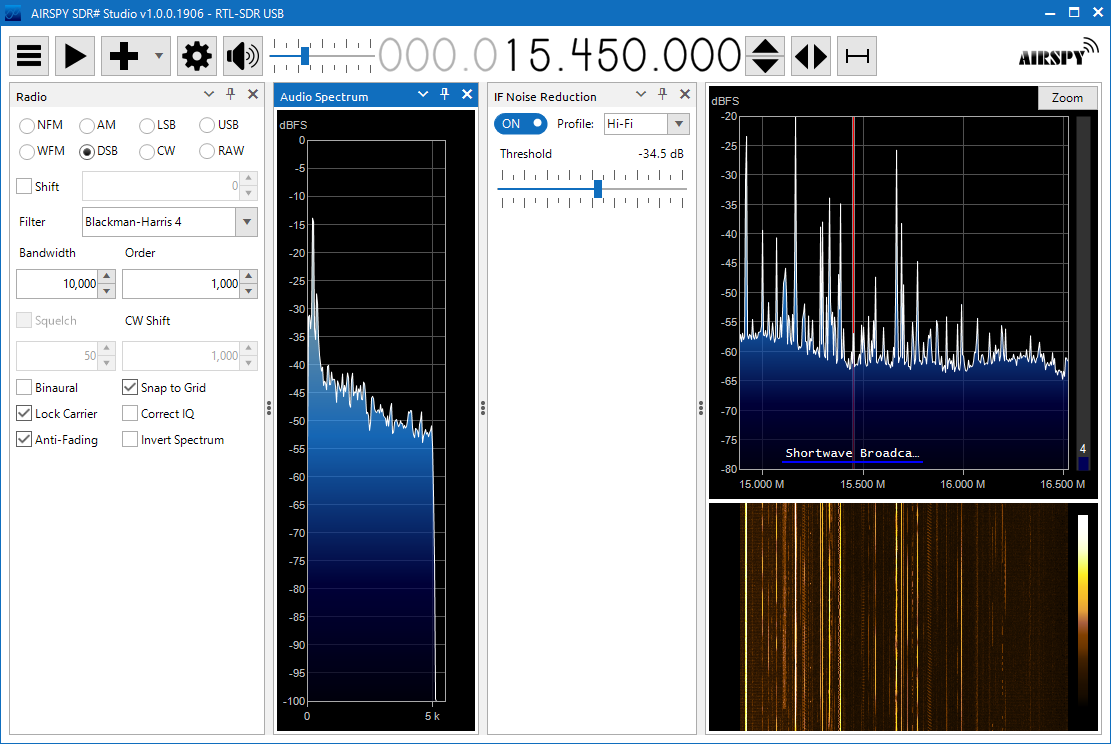
I’ll not go into every settings detail here, but two things I found very useful when tuning AM broadcast stations; one quite obvious and the other not so, were:
- Having the IF Noise Reduction window active. Using it on the ‘Hi-Fi’ setting and making constant minor adjustments to the ‘Threshold’ value was very useful in picking out detail.
- The not so obvious one is to use DSB mode. Although the transmitted signal is effectively double sideband with carrier, it is easy to ‘zero beat’ out the carrier signal by choosing an appropriate step in the SDR# ‘Step menu’. Using that method means I know precisely the frequency I’m listening to and can check against published data.
I hope that this might appeal to both the experimenter, and those with limited real estate like myself, who would benefit from this small form factor type of radio.
I understand there is scope for venturing into the higher frequencies within Monitor, so hopefully I might able to show how to use SDR for some of those activities in the future!
Robin Shelley.
G-21334.
HDSDR is a free SDR application which will run under all versions of Windows™ client software from 2000 onward.
It is a relatively ‘no frills’ programme, which makes good use of screen space, and provides a degree of automation with regard to spectrum zooming and default bandwidth settings according to the chosen demodulation protocol.
When installing HDSDR to use with an R820T/R820T2 based RTL-SDR dongle, make sure you don’t install any of the software that came with the hardware.
Plug in the dongle and then install and run ‘Zadig’. ‘Zadig’ is a generic Windows™ USB driver installer which can be found at: https://zadig.akeo.ie/
You need to select ‘Options’ and List All Devices, then select the “Bulk-In, Interface (Interface 0)" from the drop down list; or the RTL2832UHIDIR or RTL2832U options if you cannot see Interface 0.
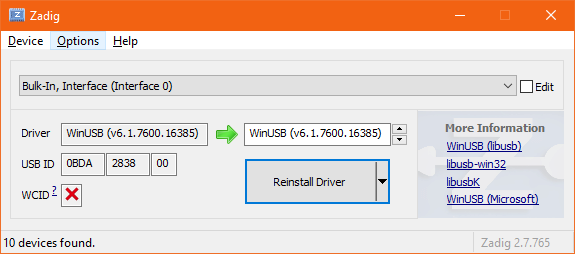
Zadig - Interface 0
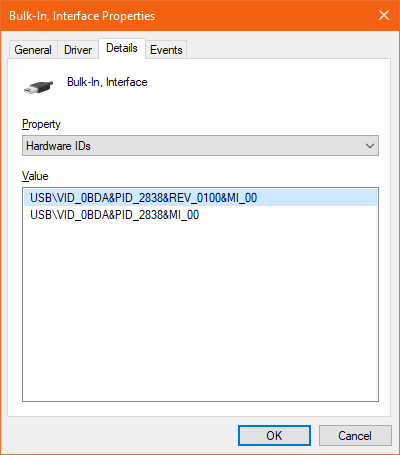
Device Manager - confirmation

DLL file
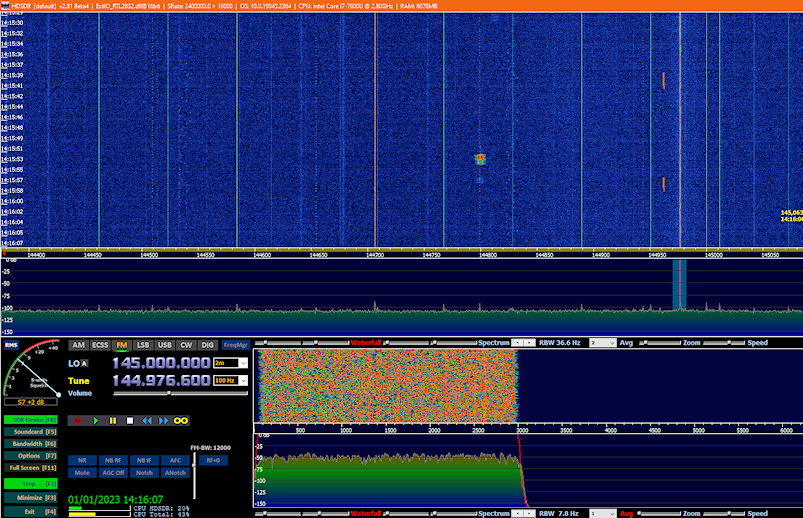
HDSDR Screen
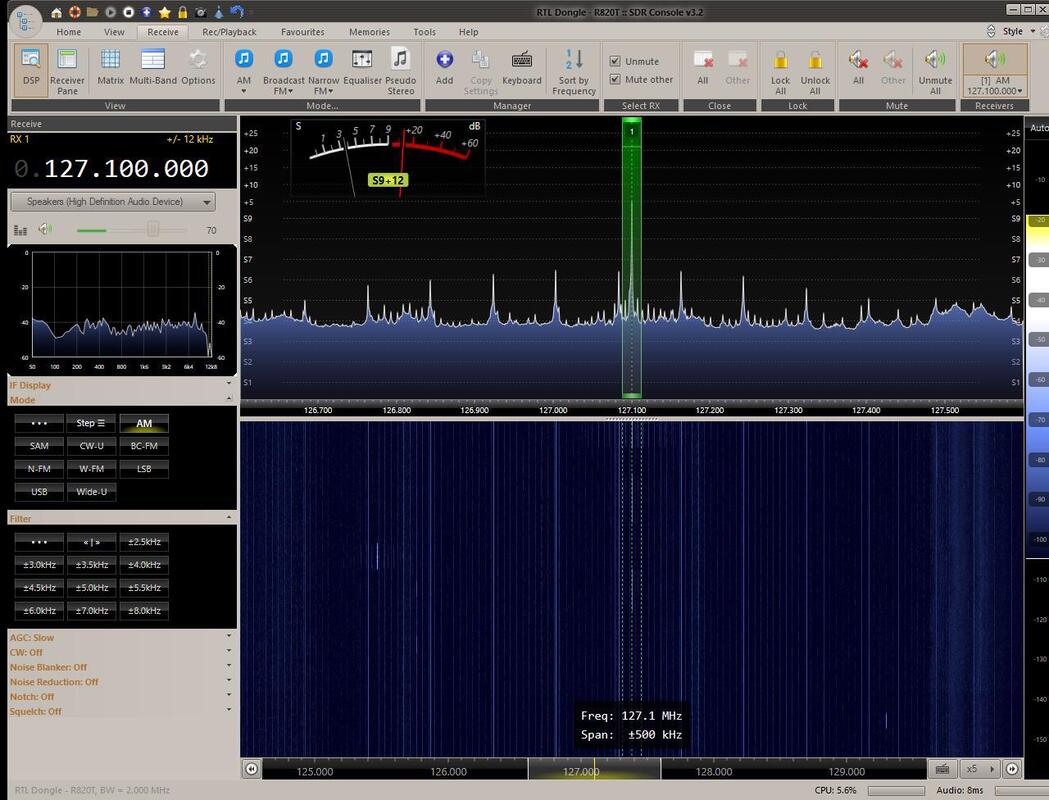
SDR Console - 1
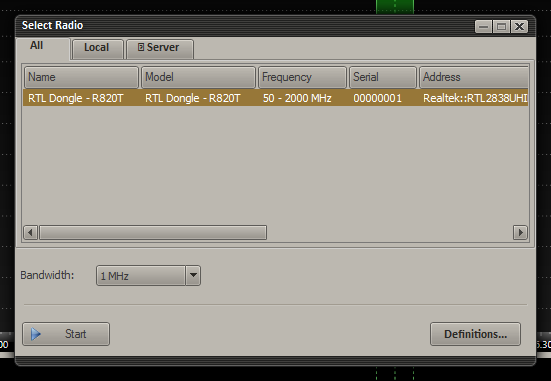
Select hardware screen
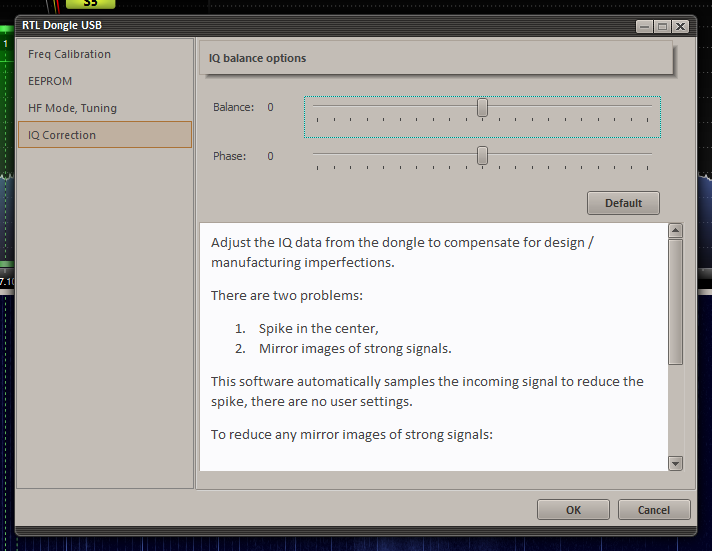
RTL Dongle USB

Scale Adjustment
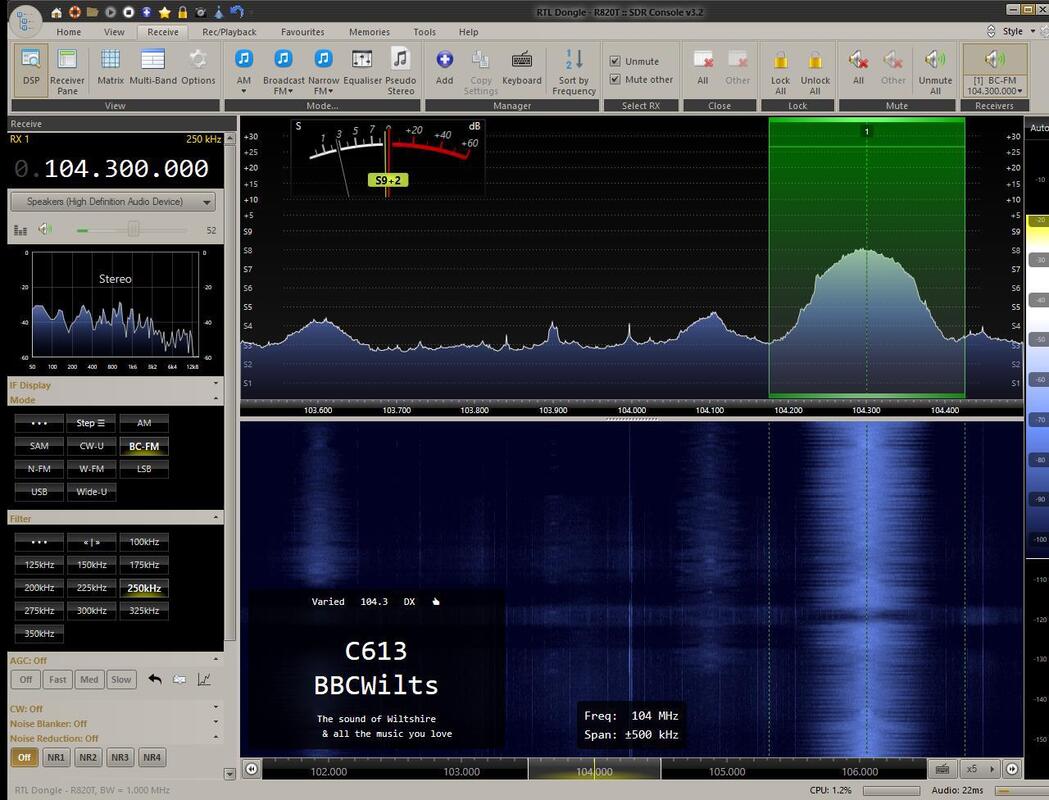
SDR Console - 2
Zadig - Properties sheet
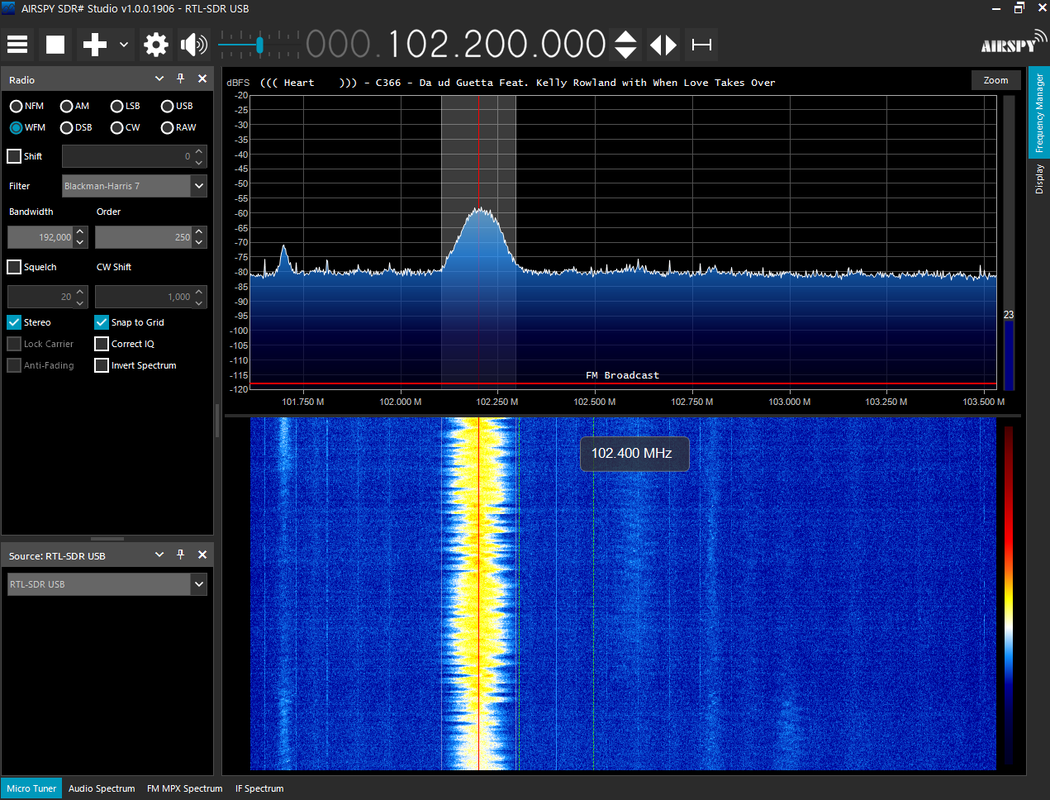
SDR# - Screen
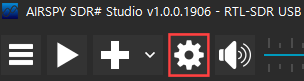
SDR# - Settings cog
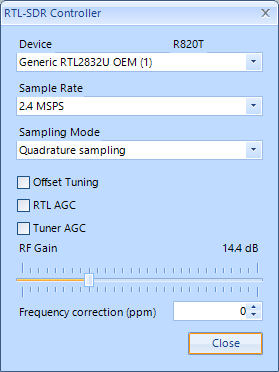
SDR# - Hardware settings


SDR# - showing 3-bar button

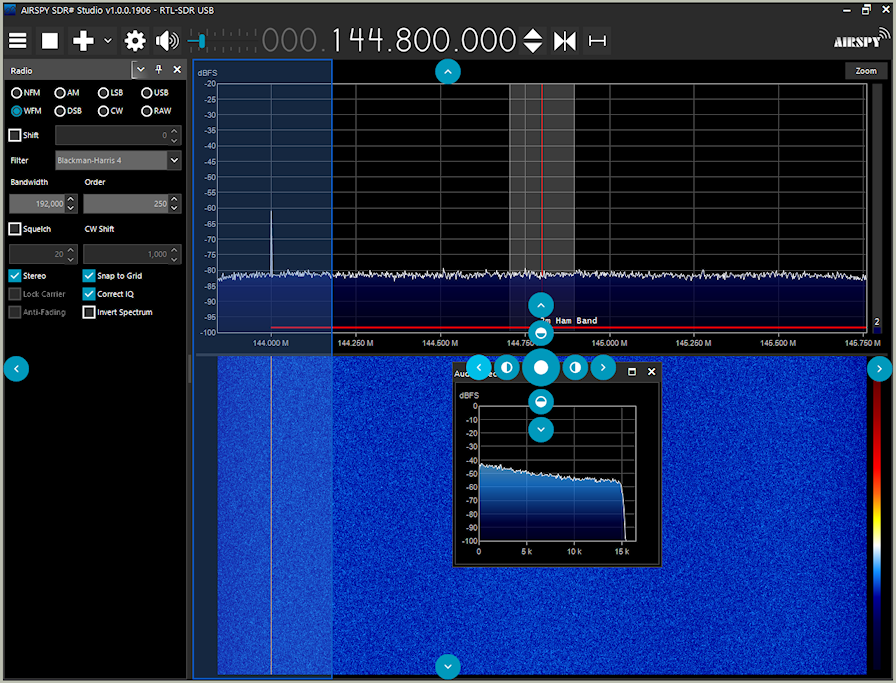
SDR# docking guides